Setup Guide for Cudy LT700, LT500D, LT12, LT400 Outdoor, LT500 Outdoor, LT700 Outdoor
You can use the video instructions for setup:
Initial setup:
To begin configuring the router, you need to connect to it via Ethernet cable or Wi-Fi.
- To connect via cable, you need to use the LAN port.
- To connect via Wi-Fi, find your network in the list of available Wi-Fi networks and connect to it. If the router is reset to factory settings, the Wi-Fi network name (SSID) and password can be found on the sticker on the bottom of the router.
If you are using a mobile phone, disable mobile data before connecting.
1) Open a browser and enter the address 192.168.10.1 in the browser's address bar.
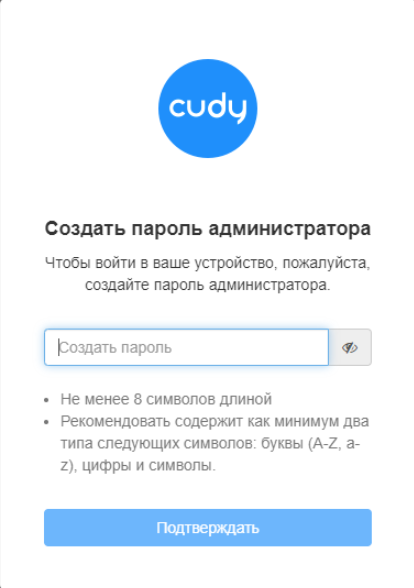
If the router is running firmware version 2.1.3, you will immediately see a welcome screen prompting you to set an administrator password.
Enter a password (it is recommended to use the same password as your personal account) and click Confirm.
On older firmware versions, the interface may look different and may ask for the default password: "admin"
2) After confirming the password, you will be taken to the Quick Setup page.
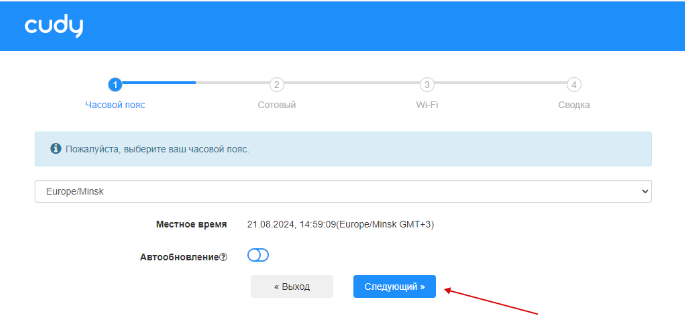
3) Select your time zone and click Next. Then fill in the APN settings according to the instructions.
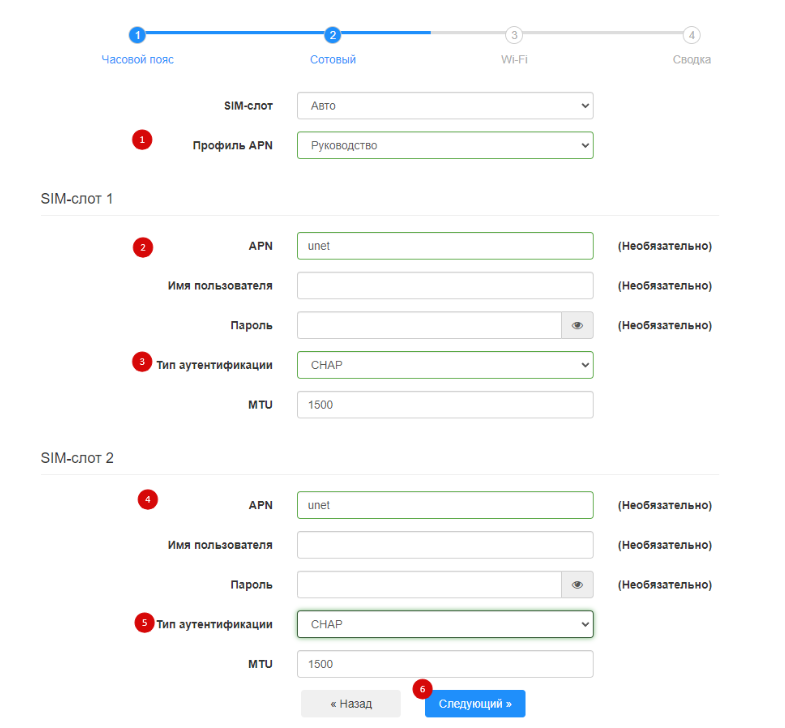
Routers Cudy LT700 and LT12 have two SIM card slots.
For proper configuration:
- Select APN Profile → Manual.
- Enter the APN and authentication type for both SIM card slots. Then click "Next".
- This ensures the connection will continue working if the router switches to the second SIM slot.
Router LT500D has only one SIM card slot, so only one profile needs to be configured.
Wi-Fi Settings
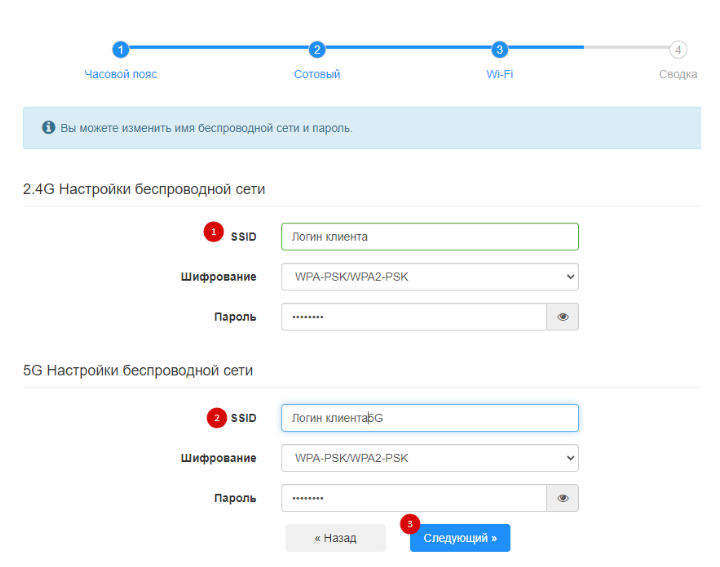
4) On the next screen you can configure your Wi-Fi networks (2.4 GHz and 5 GHz).
You can:
- change the Wi-Fi network name (SSID)
- set a new Wi-Fi password
Enter the desired values and click Next.
Note: The Cudy LT400 Outdoor router supports only the 2.4 GHz Wi-Fi band.
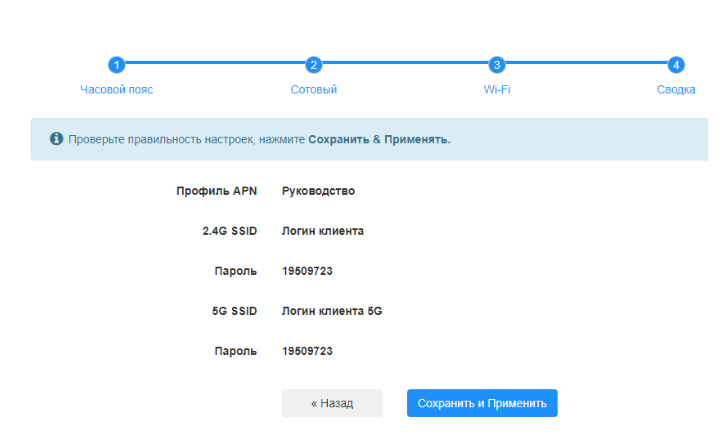
5) The final screen will display the Wi-Fi network names and passwords. Click "Save" and "Apply".
Remote Access Settings
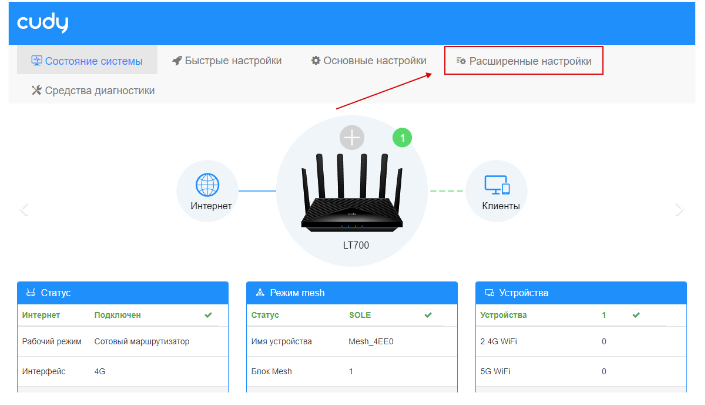
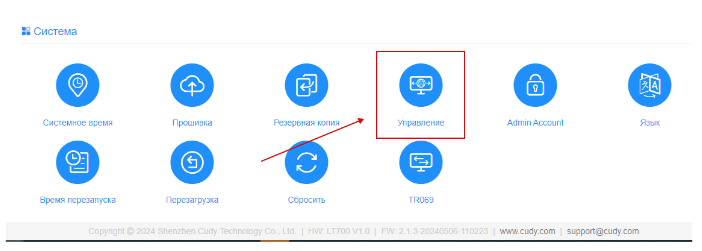
6) Go to "Advanced Settings" → "Management"
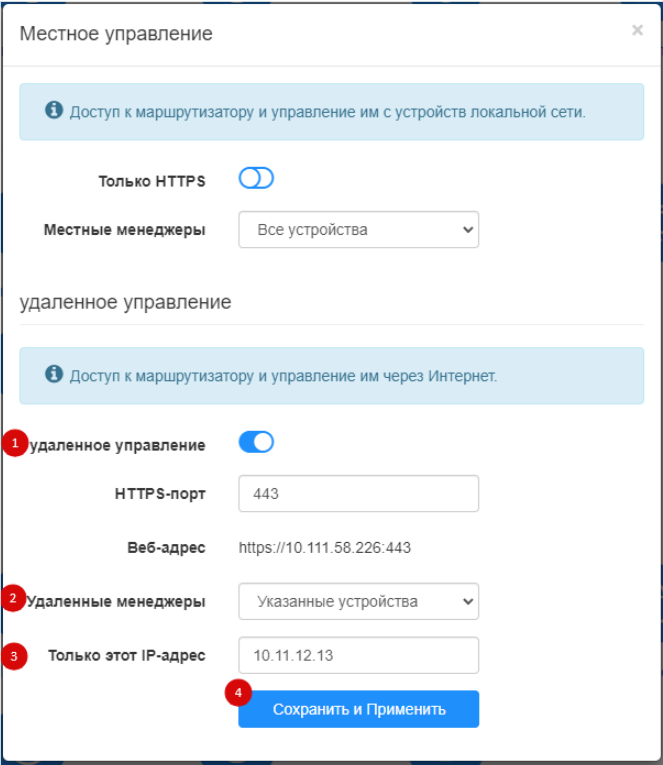
7) Open Remote Management section.
In "Remote Managers", select "Specified devices". Then enter the IP address: 10.11.12.13
Click Save and Apply.
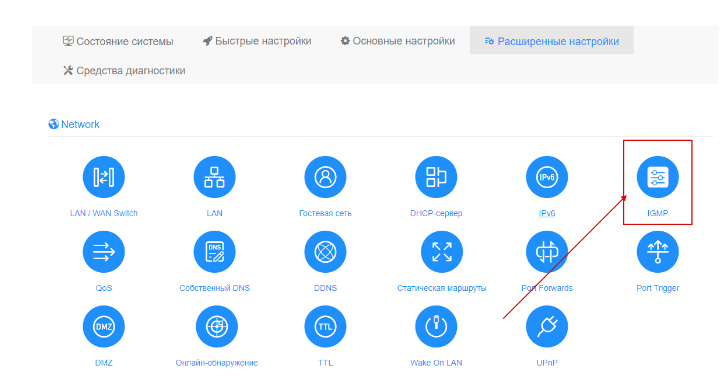
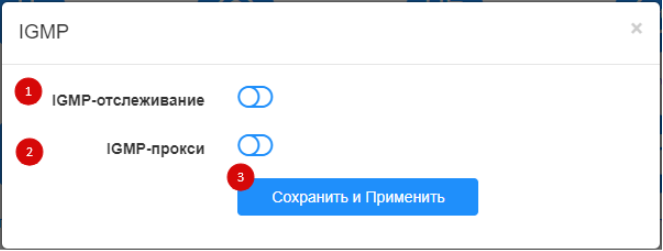
8) Next, open the IGMP section in the top right corner and disable:
- IGMP Snooping
- IGMP Proxy
Click "Save" and "Apply".
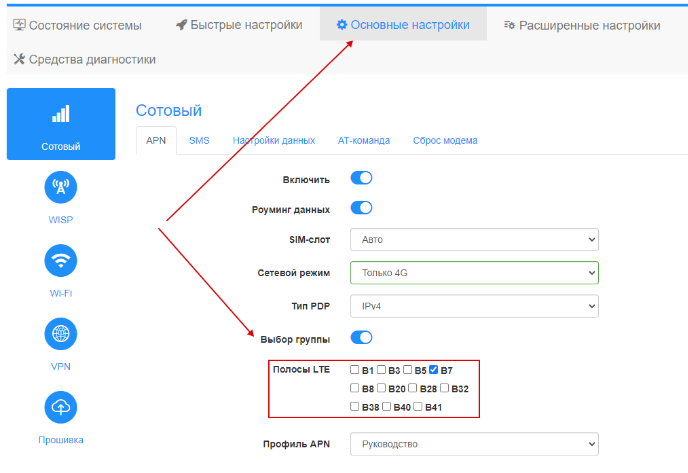
How to Force a Specific LTE Band
Go to "Basic Settings" → "Cellular" → "APN"
Enable "Band Selection" and choose the desired frequency band:
- Band 20
- Band 3
- Band 7
After selecting the band, click Save and Apply.
How to Check the Current Connection
10) Open the "System Status" page and find the "Cellular" section.
Click "Details".
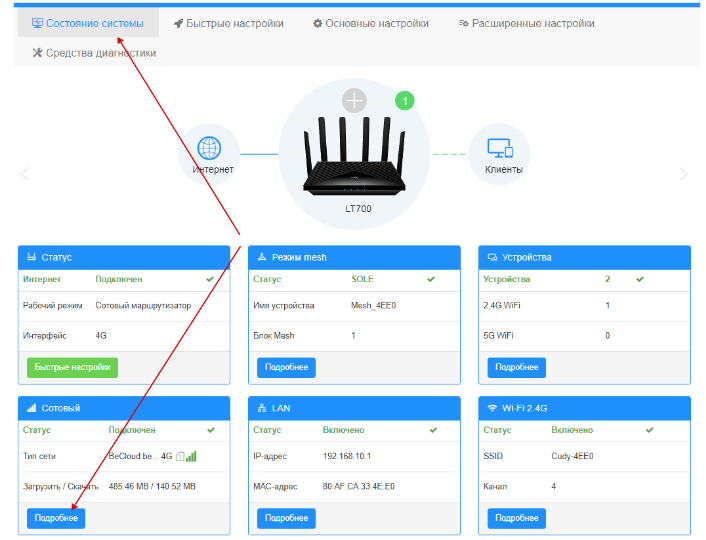
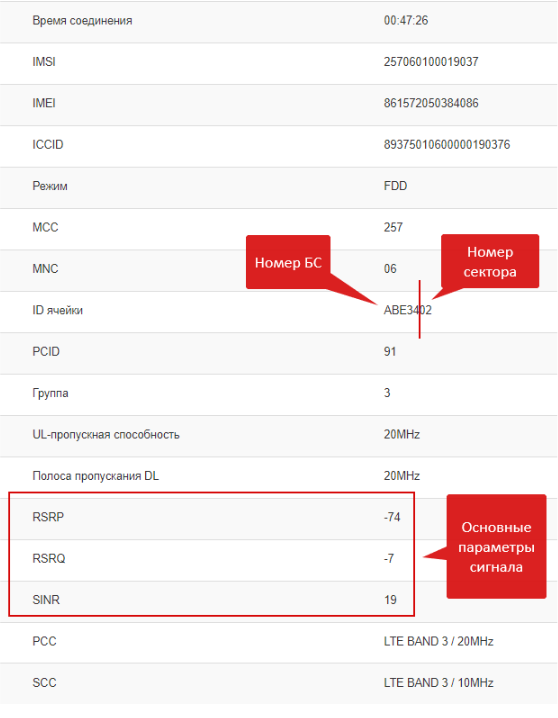
11) Here you will see information about:
- the number of connected base station
- the sector
- signal parameters
Done! Setup is complete.
Connecting an External Antenna
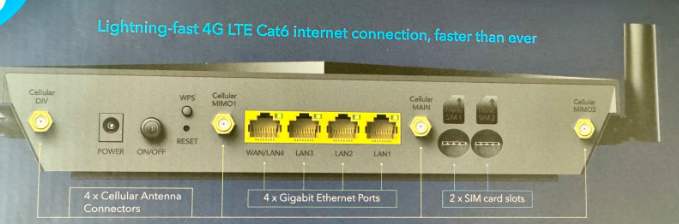
Routers Cudy LT700 and Cudy LT12 support MIMO 4×4, meaning they have 4 connectors for an external antenna (4 cables).
Router LT500D supports MIMO 2×2, so it has 2 antenna connectors (2 cables).
The antenna connectors are labeled as:
- DIV
- MIMO1
- MAIN
- MIMO2
When purchasing an antenna, make sure it matches the supported configuration.
You can also connect a MIMO 2×2 antenna by 2 cables to Cudy LT700 or LT12.
In this case:
- Connect cables to DIV and MAIN ports,
- leave MIMO1 and MIMO2 unused.
For Cudy LT400 Outdoor and LT500 Outdoor, the router has a PoE port and a dedicated power supply.
To connect an external antenna, unscrew the standard antennas and attach the external antenna cables instead.