To configure the TP-Link Archer C20 router, you must:
1. Connect to the router by cable or wi-fi.
to connect by cable, you need to use the LAN port (orange), and connect the provider's cable to the WAN port (blue)
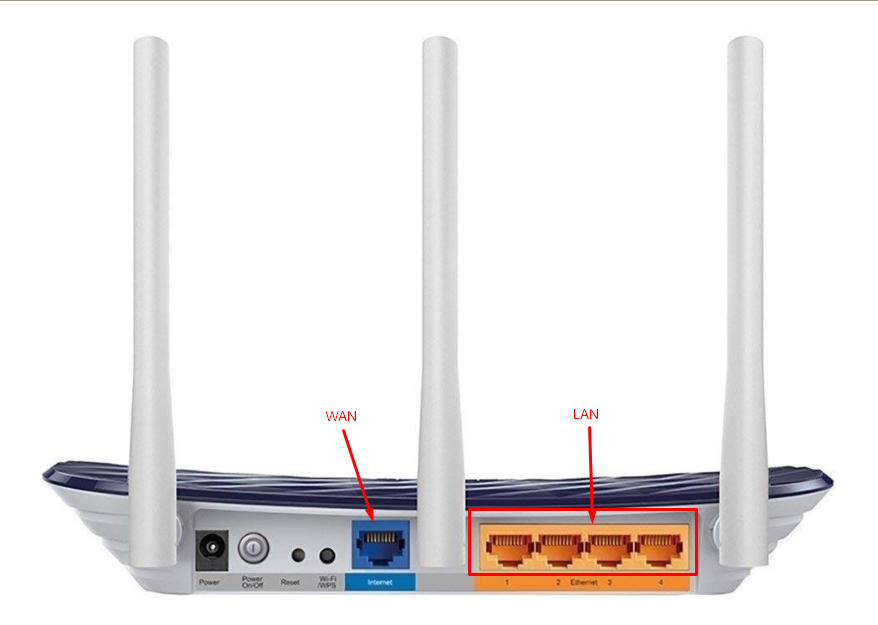
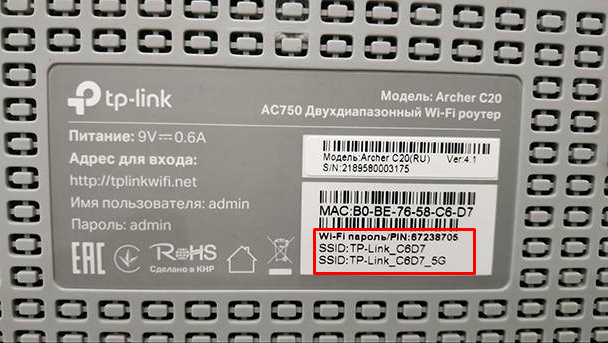
to connect by wi-fi - you need to find your network in the list of available wi-fi networks and connect to it. If the router is reset to factory settings, then the name of the wi-fi network and the password for it you can find from the bottom on the sticker of the router.
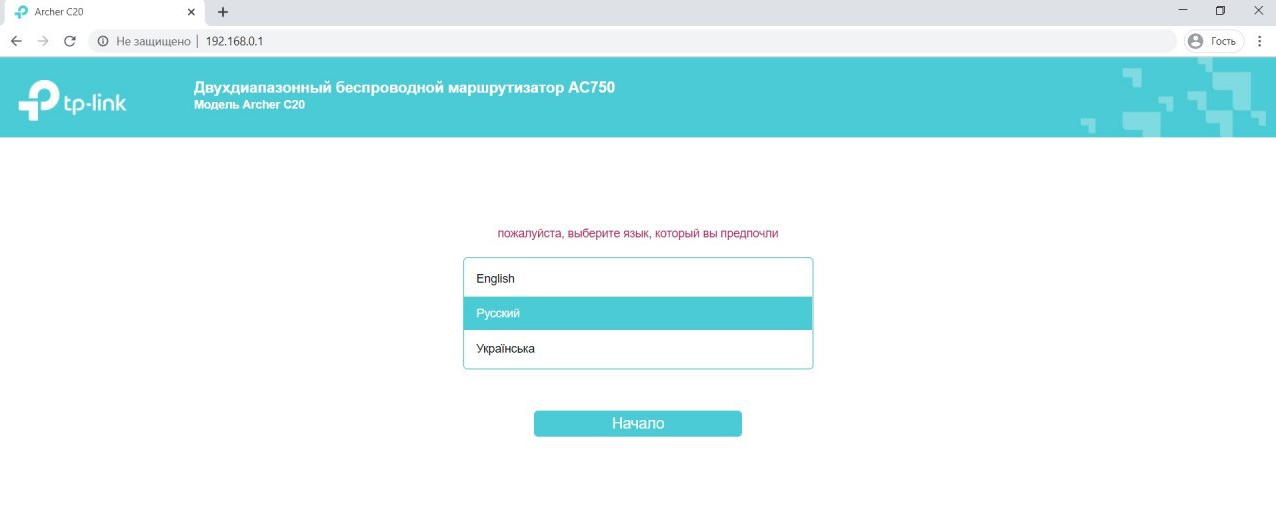
2. Open a browser and enter the address 192.168.0.1 in the address bar and press the Enter button.
3. The web interface of the router will open. You will immediately be prompted to select a language. Select your language and click the "Start" button.
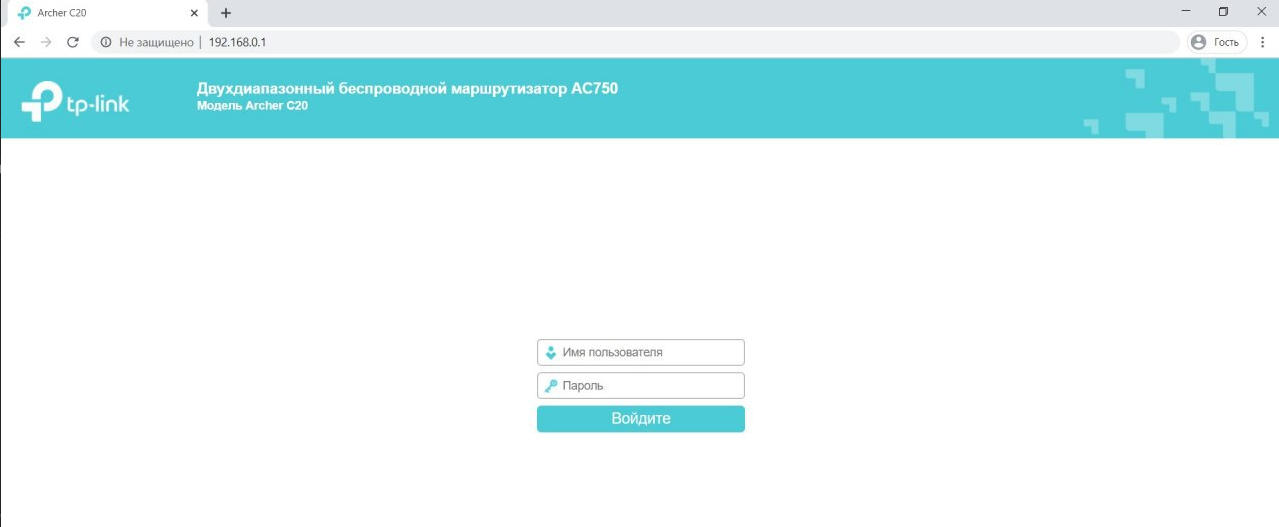
4. Next, you need to enter a username and password to access the router settings. Enter "admin" as the username and "admin" as the password. Click the "Login" button. If you get an error with an incorrect login or password, then try the password admin1 or Admin1.
5. Now you are in the router settings. In the menu on the left, select the "Network" section and the "WAN" subsection.
If the interface is different (may be updated), click here.
6. In the "Connection Type" section, select the "PPPoE" section from the drop-down menu
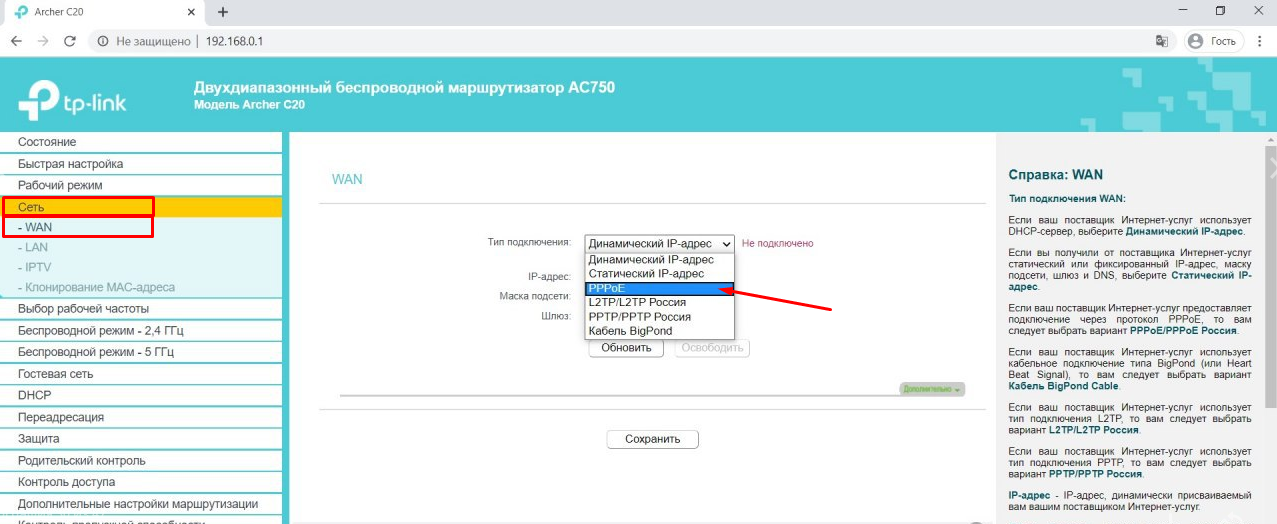
.
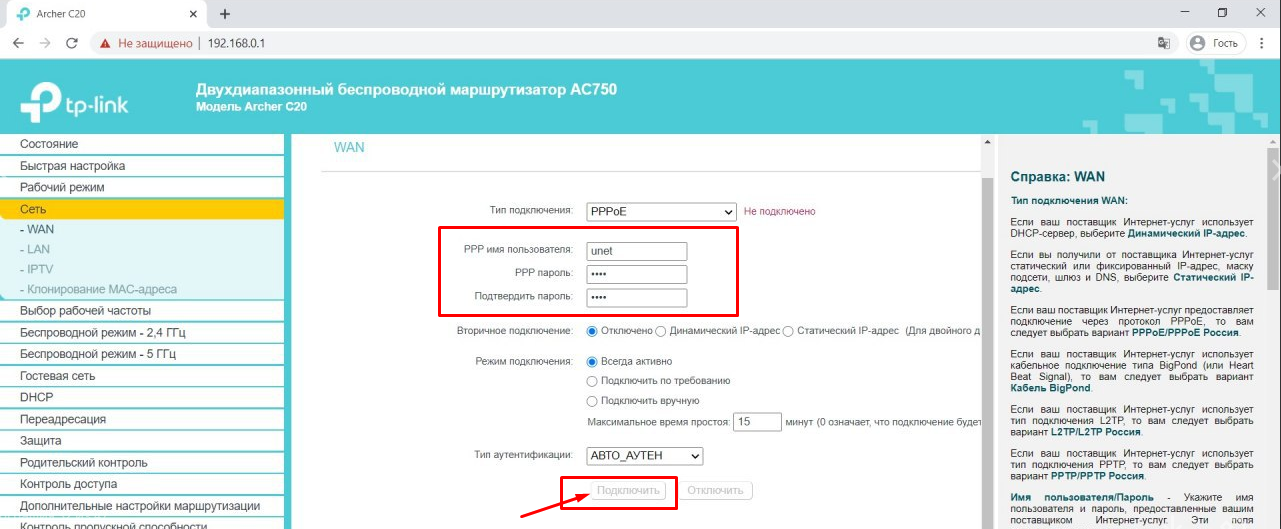
7. In the appeared field "PPP username" you need to specify your login from your personal account. In the fields "PPP password" and "Confirm password" you need to specify your password from your personal account. Then click the "Connect" button at the bottom of the page.
8. The next step is Wi-Fi settings. Since the router is dual-band, it is necessary to configure two Wi-Fi networks: "Wireless mode - 2.4 GHz" and "Wireless mode - 5 GHz".
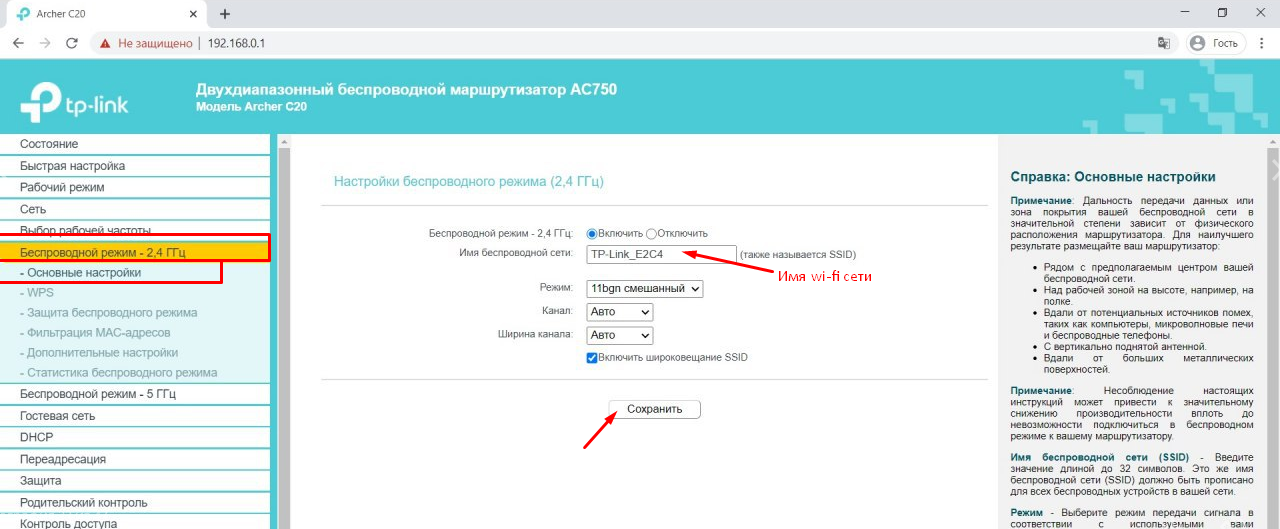
In the menu on the left, select the "Wireless - 2.4 GHz" section.
In the "Wireless network name" field, enter the name of your wireless network (you can choose any name). Then click the "Save" button.
Next, in the "Wireless Mode - 2.4 GHz" section, select the "Wireless Network Security" subsection. In the "Wireless Password" field, you can enter the password that you want, it will be used to connect to the wireless Wi-Fi network.
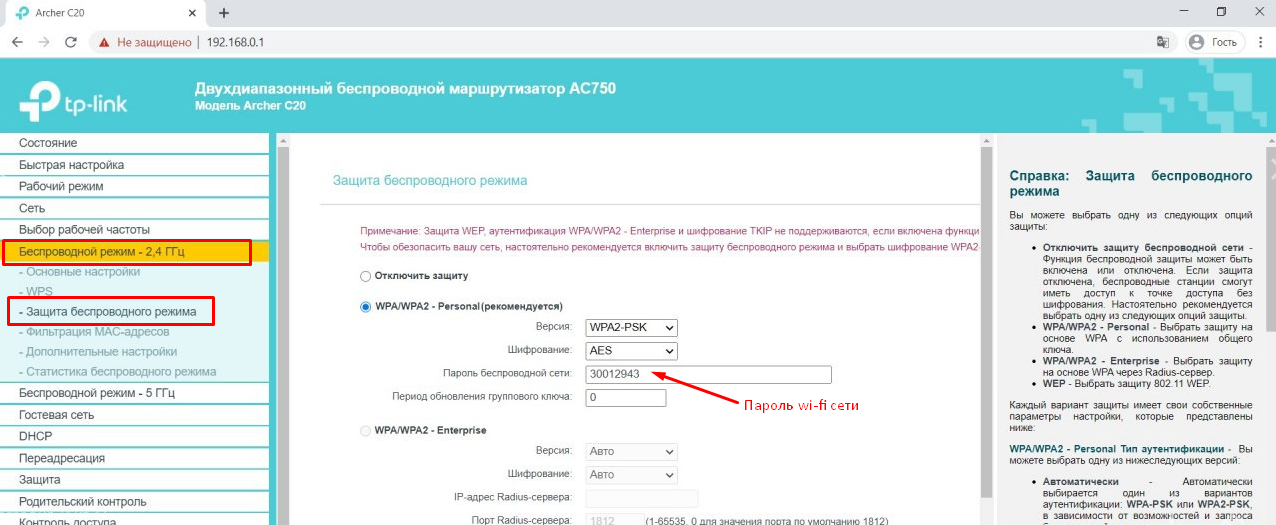
Then click the "Save" button at the bottom of the page.
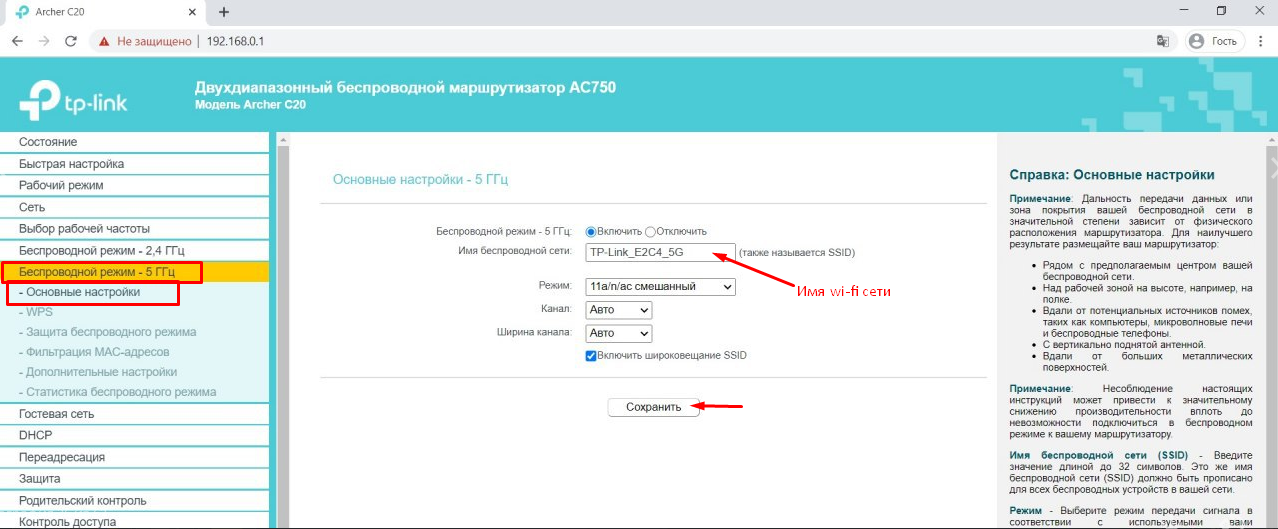
10. Now we need to set up a 5GHz Wi-Fi network. To do this, in the menu on the left, select the section "Wireless mode - 5 GHz".
In the "Wireless network name" field, enter the name of your wireless network (you can choose any name). Then click the "Save" button.
We recommend that the 2.4GHz and 5GHz networks either be called by different names, or leave the “_5G” mark in the name of the network operating at the 5GHz frequency. This is necessary in order to separate the networks and have an understanding of what frequency you are currently connected to.
11. Next, in the "Wireless Mode - 5 GHz" section, you must select the "Wireless Network Security" subsection. In the "Wireless Password" field, you can enter the password that you would like to have from your Wi-Fi network.
We recommend you to use the same password for the 5 GHz and the 2.4 GHz frequency to avoid confusion.
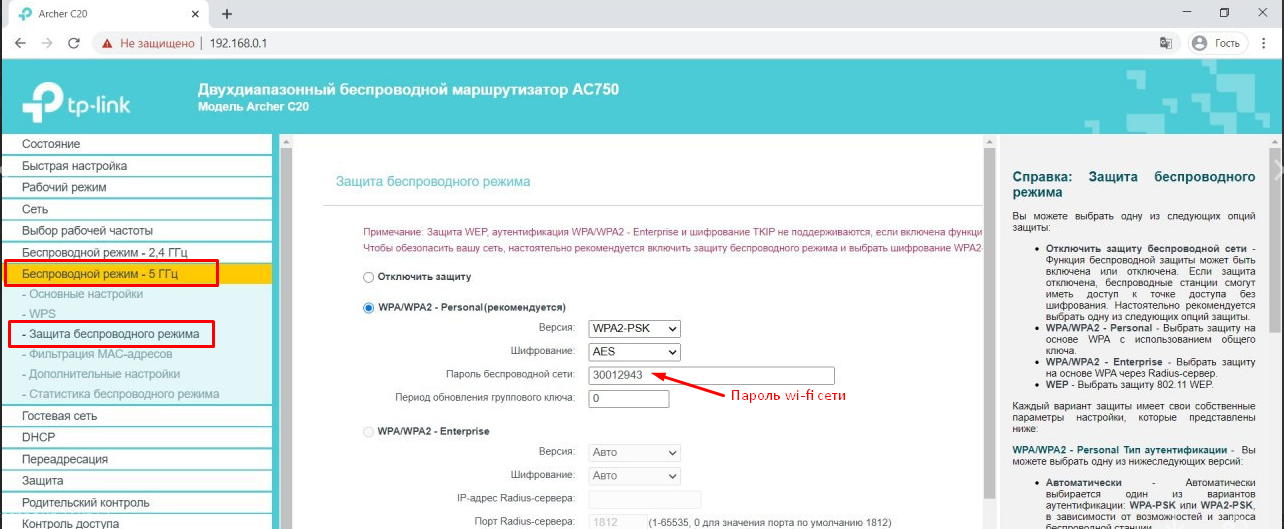
Then click the "Save" button at the bottom of the page.
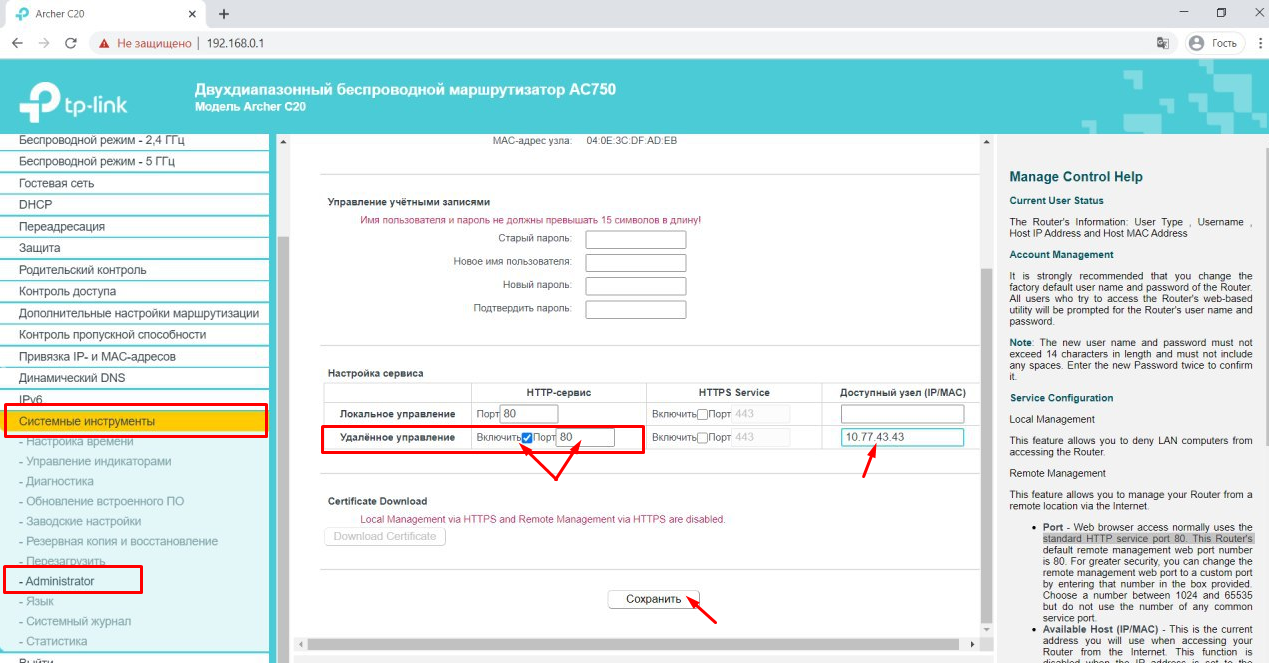
12. Setting up remote access may be needed in different situations. Our technical support specialists ask users to set up remote access to perform a complete diagnostic, as well as to be able to remotely change router settings, manage connected devices, reboot the router etc.
You need to open the "System Tools" - "Administrator" section.
In the "Service settings" subsection, put a mark near the "Remote control" section, and next to it, indicate ip - 10.77.43.43 and press the button "Save".
Setup is completed! Enjoy using our internet! :)
New interface (Quick setup)
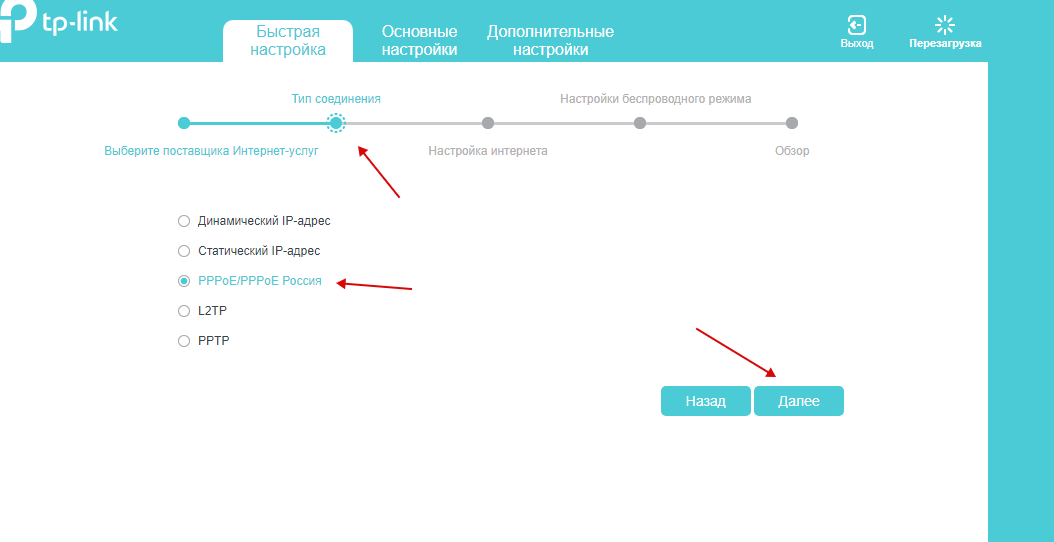
Go to the section "Quick setup" and put the mark "I did not find suitable settings", Next
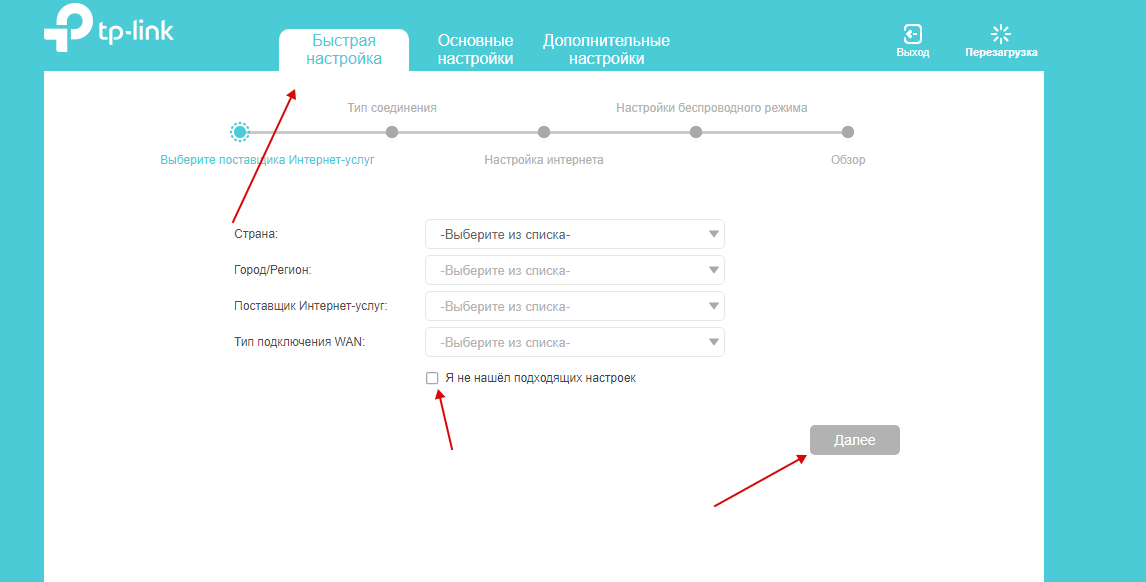
Select PPPoE connection type, Next
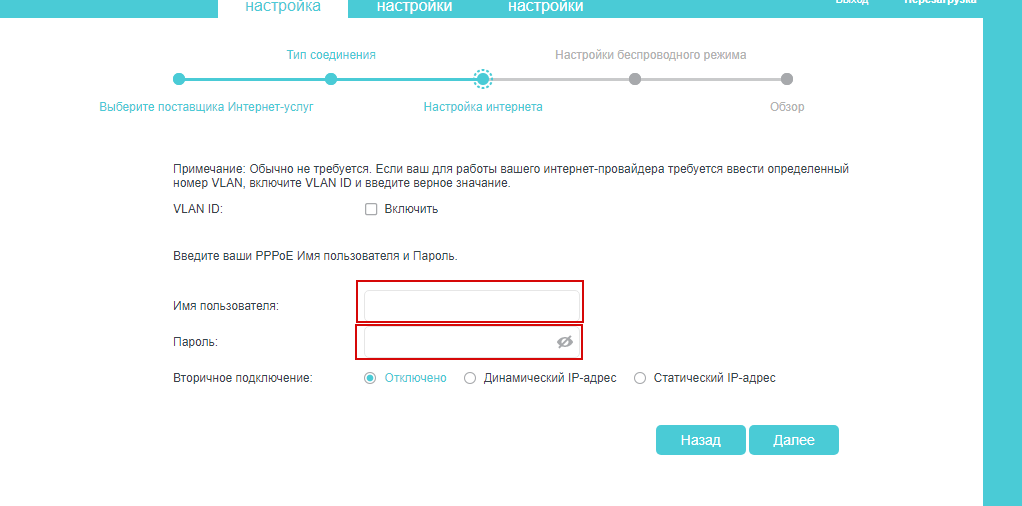
Enter your login and password (from your personal account my.unet.by) and click the "Next" button.
In the next step, you can set up your Wi-Fi. SSID - network name displayed in the list of available networks.
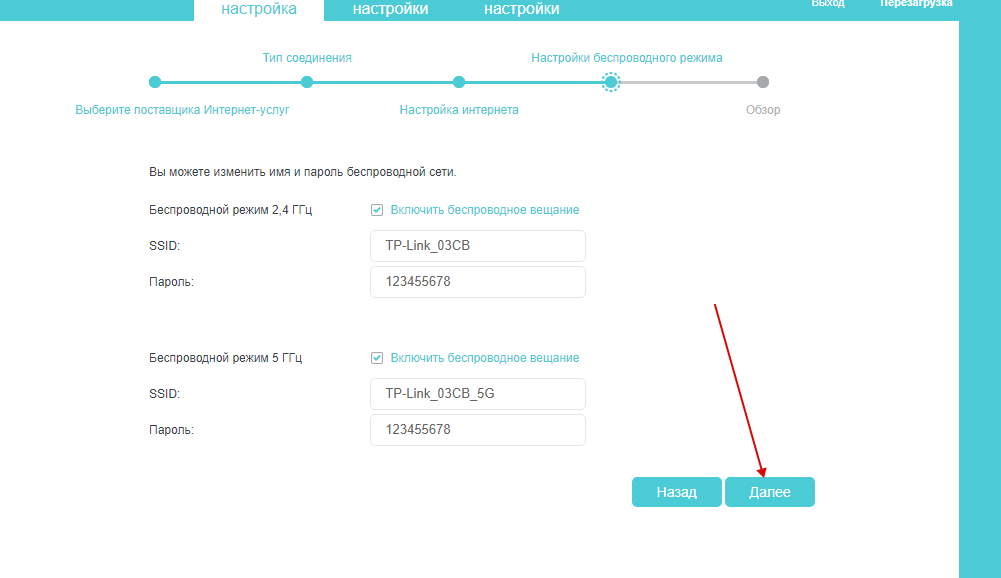
Save, for sure.
Important!
Why can't the device see the 5GHz network?
1. This is possible when your device can't work at this frequency. You can find out on the manufacturer's website or on catalog.onliner.by.
If it is a laptop or a computer, then you can solve this problem by purchasing an external wifi module. In the case of a phone (or tablet), unfortunately, this will only be solved by purchasing a new gadget that supports the “ac” standard.
2. This is also possible if your router automatically selects the channel on which your device cannot work (usually for xiaomi routers).
You need to reboot the router. If it does not help, change the data transmission channel manually.
Subscribe to the mobile application: Viber, Telegram.
And also follow the latest news in our Telegram channel.
If you have any questions - write to us or call 777 82 82 (any mobile operator).