When installing the router, you need to set up a PPPoE connection, otherwise there will be no access to the Internet. The wireless network will appear, but after connecting to it, there will be no Internet on your devices. On computers, for example, the connection status will be "Without access to the Internet." By cable, from the router, the Internet won't also not work.
It is important to correctly specify the connection type and set the required parameters. In our network we use the PPPoE connection type.
As an example, we use a TP-Link router.
1. First you need to go through any browser to the web interface of the router. On the back side of the router you can find its address, login and password, for example, the address http://192.168.0.1/
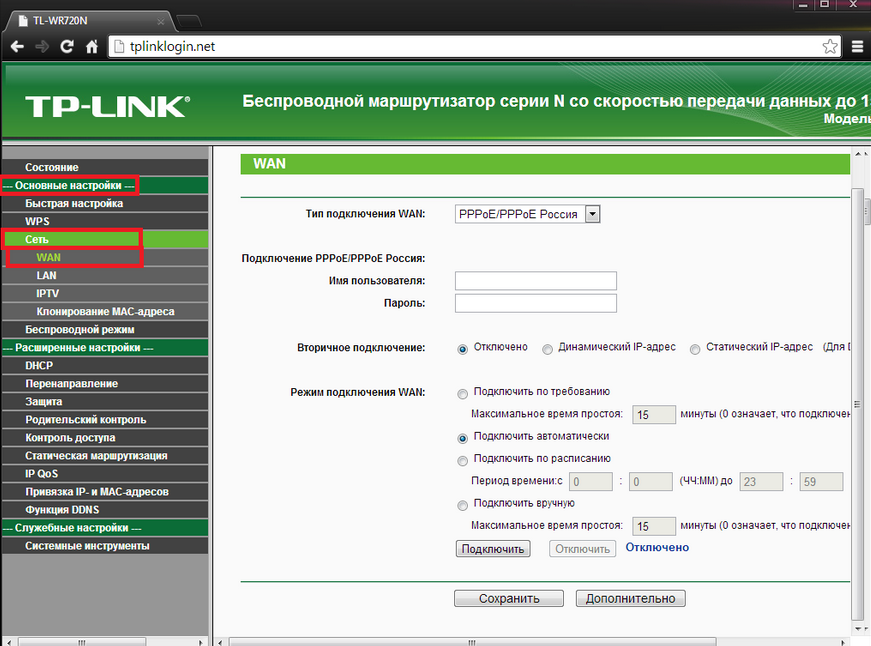
2. Select Basic Settings → Network → WAN. In the "Connection type" field, select the "PPPoE / PPPoE Russia" parameter. In different models of routers, it is called differently, but the word "PPPoE" is always there.
3. Enter your login / password from the UNET.BY account. This is the data that is used for authorization, they are individual.

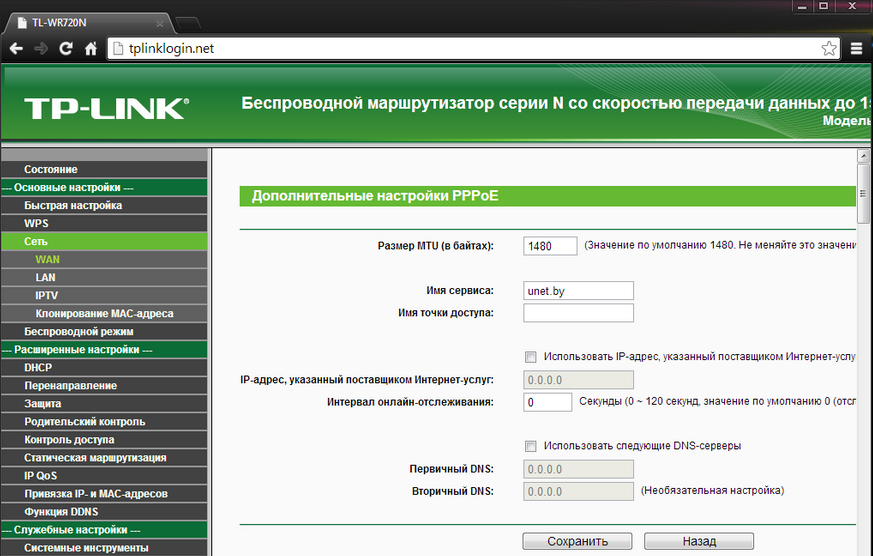
Click the "Save" button and then then "Advanced" section at the bottom of the page.

Enter UNET.BY in the Service name field and click "Save".
After completing the settings, click the "Connect" button. At the end of all changes, it is recommended to reboot the router. You need to go to the "System Tools" section, choose the "Reboot" section and after a couple of minutes the router will connect.
The setup is completed, enjoy your work in the UNET.BY network!
Subscribe to the mobile application: Viber, Telegram.
And also follow the latest news in our Telegram channel.
If you have any questions - write to us or call 777 82 82 (any mobile operator).
